In this article, we will look at how to install a Zabbix Agent on Linux, connect it to a Zabbix server, and configure data encryption using PSK.
To install the Zabbix agent on Linux, you need to add the official repository. Check the Linux version on your host, go to the website https://www.zabbix.com/download, select your Zabbix Server version and Linux distribution.
A set of commands will be generated for you to install the repository and agent. 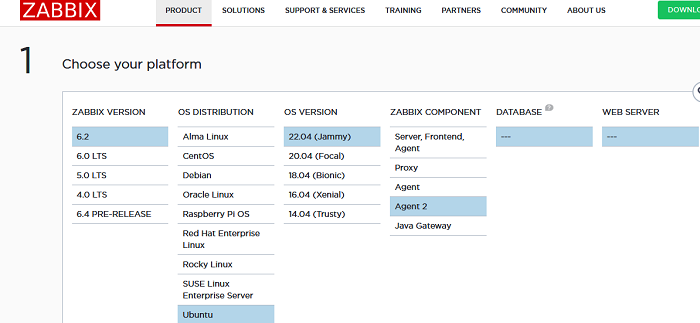
In my case, to install Zabbix Agent2 6.on Ubuntu 22.04 LTSC, I need to follow the next steps. Install the Zabbix repository and update the package list:
$ wget https://repo.zabbix.com/zabbix/6.2/ubuntu/pool/main/z/zabbix-release/zabbix-release_6.2-4%2Bubuntu22.04_all.deb
$ sudo dpkg -i zabbix-release_6.2-4+ubuntu22.04_all.deb
$ sudo apt update
Now you can install Zabbix agent2:
$ sudo apt install zabbix-agent2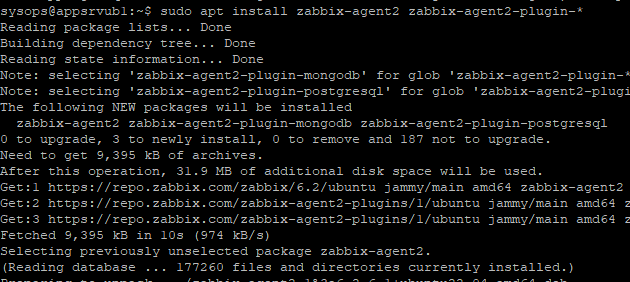
Start the Zabbix agent service and add it to the startup.
$ sudo systemctl restart zabbix-agent2
$ sudo systemctl enable zabbix-agent2
Make sure that the Zabbix agent is up and running:
$ sudo systemctl status zabbix-agent2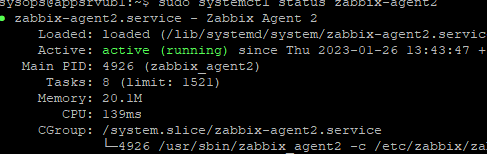
Now you need to edit the agent configuration file:
$ sudo mcedit /etc/zabbix/zabbix_agent2.conf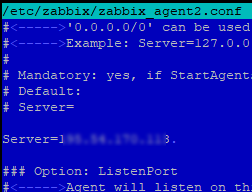
Server=Zabbix_Server_hostname_or_IP

ServerActive= Zabbix_Server_hostname_or_IP

Hostname= appsrvub1
There are two agent check modes available in Zabbix::
- Passive checks – the Zabbix server requests data
- Active checks – the agent itself sends data to the Zabbix server (in my case, the server with the agent is behind NAT, so I use active mode for it).
You can completely disable passive checks:
StartAgents=0
Restart the Zabbix agent.
$ sudo systemctl restart zabbix-agent2Verify that the agent started successfully
$ cat /var/log/zabbix/zabbix_agent2.log$ nc -zv zabbixsrv1 10051Now you need to add a new agent through the Zabbix web interface.
- Sign-in Zabbix and go to Configuration -> Hosts. Click Create host;
- Specify the host name (should match the value in the agent configuration file);
- Assign a template (in my case it is Linux by Zabbix agent active) and a host group
- My Zabbix agent is located behind a NAT, so I do not need to specify an IP address on the agent’s interface. Just enter 0.0.0.0 here;
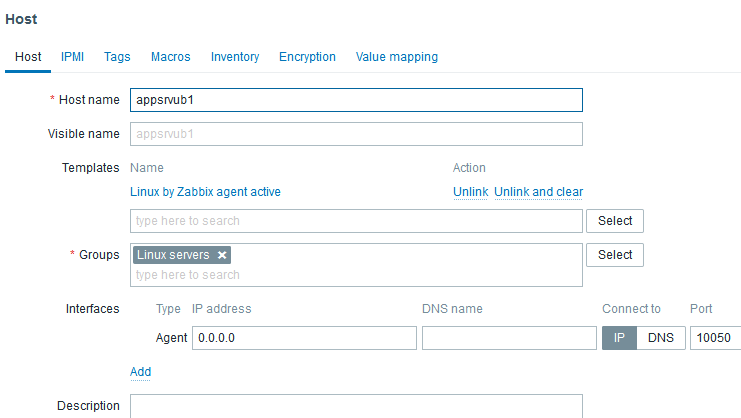
- Save the changes;
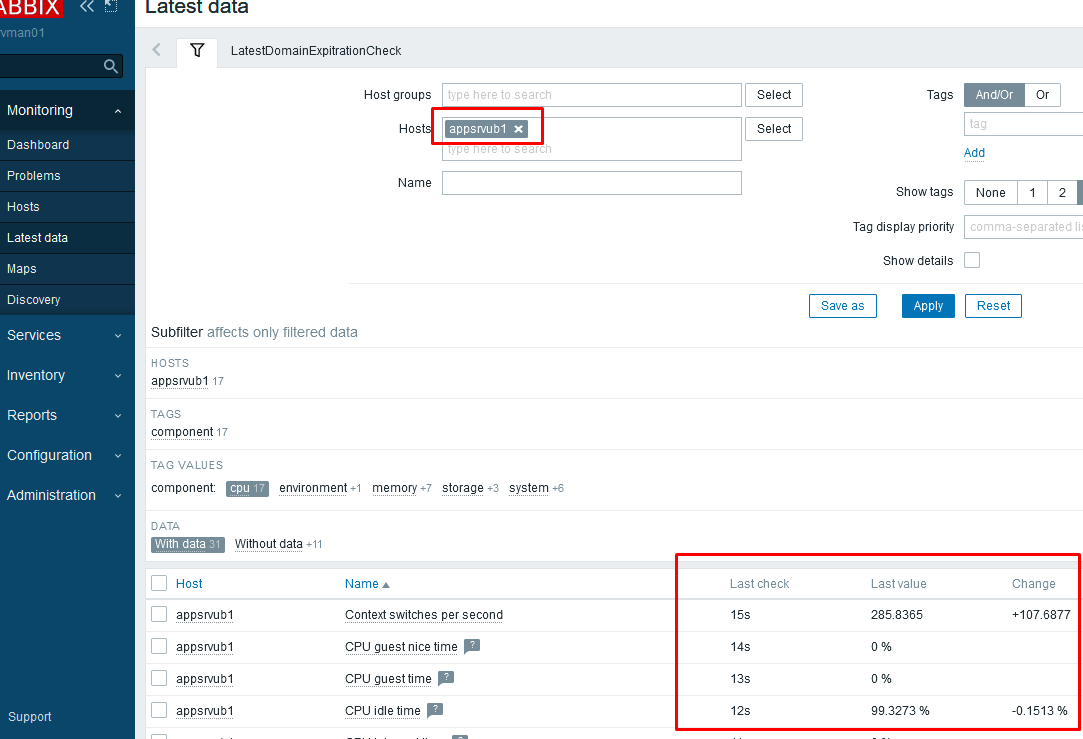
- Now check that the Zabbix server is receiving data from the agent. Navigate to Monitoring -> Latest Data, select your host under Hosts, and click Apply;
- As you can see the data from the agent is now available on the Zabbix server.
By default, the Zabbix agent sends data to the server in clear text. If you are using a public network or the Internet to connect to your Zabbix server, be sure to encrypt your traffic with Pre-Shared Keys (PSK).
Connect to the agent and generate a 256-bit PSK key using openssl:
# openssl rand -hex 32 > /etc/zabbix/zabbix_agent.psk
# chown zabbix:zabbix /etc/zabbix/zabbix_agent.psk
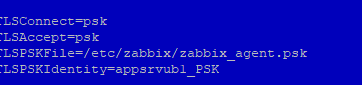
# chmod 400 /etc/zabbix/zabbix_agent.pskNow add the PSK encryption setting to the agent configuration file:
# mcedit /etc/zabbix/zabbix_agent2.confTLSConnect=psk
TLSAccept=psk
TLSPSKFile=/etc/zabbix/zabbix_agent.psk
TLSPSKIdentity=appsrvub1_PSK
Save the file and restart the Zabbix agent:
$ sudo systemctl restart zabbix-agent2Copy the value of the PSK key:
$ cat /etc/zabbix/zabbix_agent.pskNow you need to specify your PSK key in the host settings on the Zabbix server.
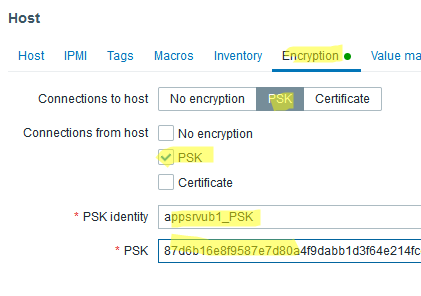
- Open the host settings and go to the Encryption tab;
- Enable PSK;
- Paste the TLSPSKIdentity value from the agent configuration file into the PSK Identity field;
- Paste your PSK key to the next field;
- Click Update.
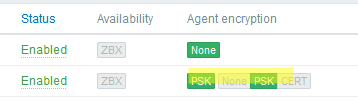
- If you have configured everything correctly, the host information in Zabbix will show that the agent is using a connection with PSK encryption.