
The automatic registry backup feature has been enabled in all Windows 10 builds up to 1803. Registry files were automatically backed up with a scheduled task to the %windir%\System32\config\RegBack folder.
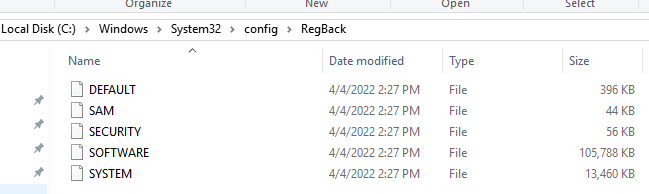
If the Windows registry is corrupted, you just had to boot your computer from an external media and replace the registry files in the C:\Windows\System32\Config\ directory with the versions from the backup folder.
Starting with Windows 10 version 1809, Microsoft decided to completely disable the automatic registry backup task to save disk space.
To enable automatic registry backup in modern Windows 10 builds, you need to create the EnablePeriodicBackup (REG_DWORD) parameter with the value 1 in the HKLM\System\CurrentControlSet\Control\Session Manager\Configuration Manager registry key.
You can create this registry setting manually or by using the PowerShell command:
New-ItemProperty -Path ″HKLM:\System\CurrentControlSet\Control\Session Manager\Configuration Manager″ -Name EnablePeriodicBackup -Type DWORD -Value 1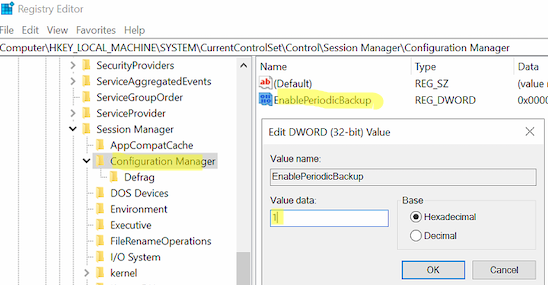
Then open Windows Task Scheduler (taskschd.msc) and go to Task Scheduler Library -> Microsoft -> Windows -> Registry. Check that the RegIdleBackup (Registry Idle Backup Task) is enabled. This task is a part of the Windows automatic maintenance task.
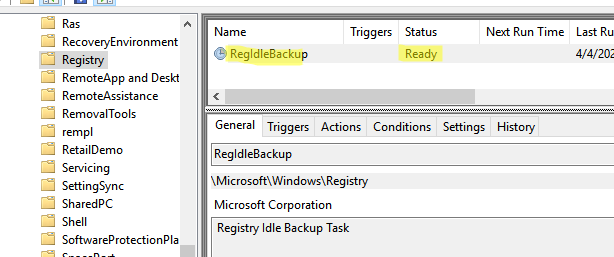
Restart your computer. Windows will backup the registry files in the next system maintenance window. Or you can run the RegIdleBackup task manually.