
The Live Migration feature in Hyper-V allows you to migrate a running virtual machine between hosts with almost no downtime. Initially, Live Migration in Hyper-V was only available as part of a Windows failover cluster with CSV shared storage. Starting with Windows Server 2012, Hyper-V Live Migration doesn’t require a cluster and shared storage. To migrate VMs, Hyper-V hosts need to be connected using a fast shared Ethernet network. This type of migration is called a Shared-nothing live migration.
Hyper-V Live Migration Requirements:
- At least two Hyper-V hosts are members of the same Active Directory domain;
- VM hardware version 5.0 or higher;
- The target host must have sufficient resources (memory, RAM) to start the VM;
- The same architecture processors must be used on Hyper-V hosts. You can enable CPU Compatibility Mode for the VM:
Set-VMProcessor testvm1 -CompatibilityForMigrationEnabled $true); - Recommended minimum of 1Gb Ethernet network between the hosts (it is a good idea to have a separate NIC for live migration traffic.). The Client for Microsoft Networks and File and Print Sharing for Microsoft Networks protocols must be enabled on the network adapters;
- Each Hyper-V host must be able to access its own virtual machine storage (local disks, SAN LUNs, or SMB 3.0 shared folders). Pass-through drives are not supported;
- Virtual switches on all Hyper-V hosts must have the same. This will help you avoid many problems.
The following resources are moved between Hyper-V hosts during Live Migration
- Virtual machines;
- Virtual disk;
- VM memory contents;
- CPU state.
Let’s take a look at how to enable and configure Live Migration in Hyper-V on Windows Server 2019/2016:
-
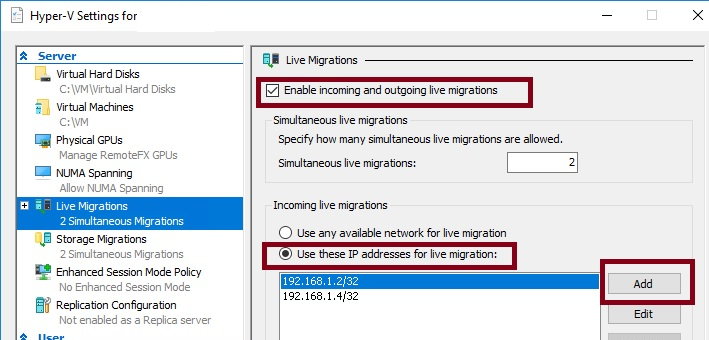
- Open Hyper-V Settings on both hosts, go to the Live Migration, and check the option “Enable incoming and outgoing live migration”. You can change the maximum number of virtual machines that can be moved simultaneously (Simultaneous live migrations). To avoid a heavy load on hosts and network, it is better to leave the default value (two simultaneous migrations);
- Specify which Hyper-V hosts can migrate the VM to this server in the Incoming Live Migration section;
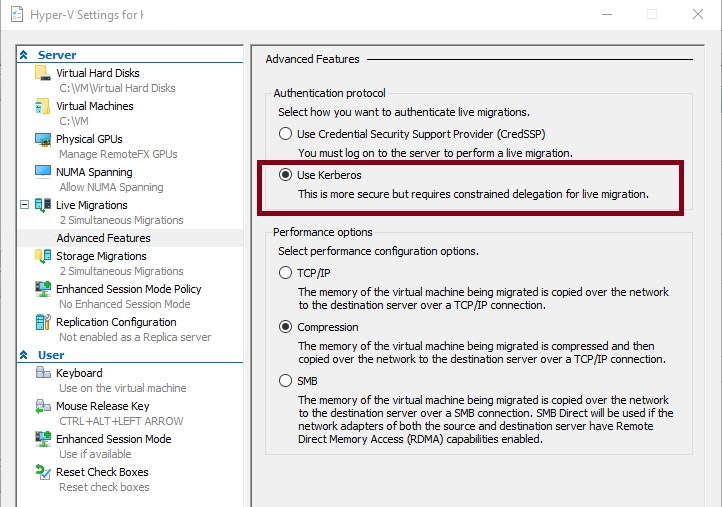
- Then go to the Advanced Features section and select the Kerberos authentication protocol.
You can do the same using PowerShell (don’t forget to configure all Hyper-V hosts):
Enable-VMMigration
Set-VMMigrationNetwork 192.168.1.2 192.168.1.4
Set-VMHost -VirtualMachineMigrationAuthenticationType KerberosSet-SmbServerConfiguration -EncryptData $false -RejectUnencryptedAccess $falseIf you are using Kerberos authentication to migrate VMs between hosts, you must configure Kerberos Constrained Delegation in the properties of the Hyper-V host account in Active Directory.
Start the ADUC console (dsa.msc), open the properties of the Hyper-V host account, and go to the Delegation tab. Select the option Trust this computer for delegation to specified services only -> Use Kerberos Only.
Click Add -> select the second Hyper-V host and the Microsoft Virtual System Migration Service.

All Live Migration servers must have the same settings.
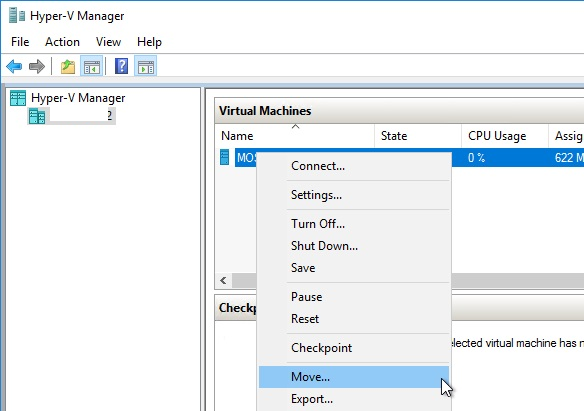
Now try to migrate the VM from one Hyper-V host to another:
- Right-click on the virtual machine and select Move;
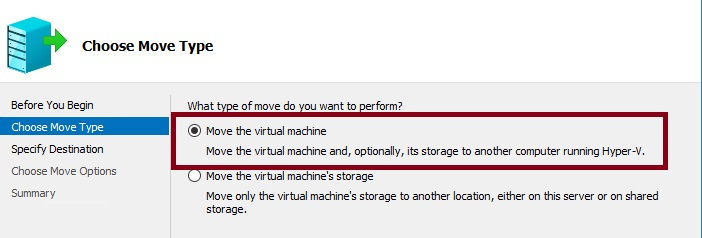
- Select the type of migration – Move the virtual machine;
- Select the target Hyper-V server to which you want to move your VM.;
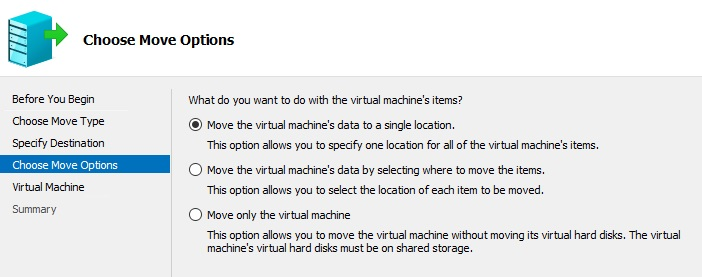
- Select Move option: Move the virtual machine’s data to a single location;
- Wait for the VM migration to another Hyper-V host to complete.
If Live Migration is not enabled on the target host, or if your server is not added to the Incoming Live Migration list, you will receive an error:
Live migrations are not enabled on this computer.

This computer is not configured for live migration of virtual machines. To enable live migration, modify the Hyper-V settings.
You can also start Live Migration using PowerShell:
Move-VM myvm1 nyhv01 -IncludeStorage -DestinationStoragePath D:\vm\myvm1
When I run the VM migration through powershell, it works. But if I run it through Hyper-V Manager, it gives me error 0x8009030E