
Windows lets you mount any shared (SMB) network folder located on a remote computer or server as a local drive. In this way, you can also connect a share on a NAS device or a USB drive that is connected to the network router. The mapped network folder is assigned a separate drive letter that can be accessed in File Explorer and file managers.
You can map a network drive from Windows GUI, cmd, and PowerShell.
To map a shared network folder from File Explorer, open the list of folders on the remote computer (\\servername), right-click on the folder and select ‘Map network drive‘. 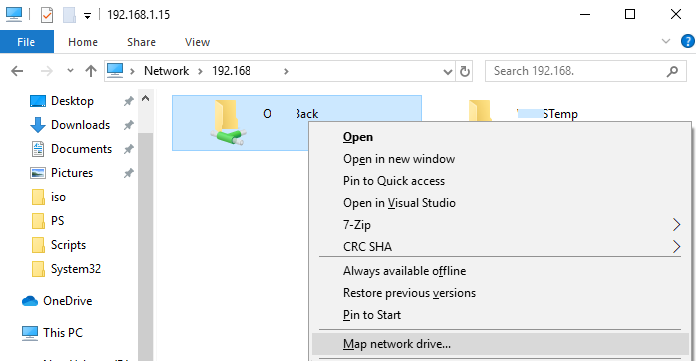
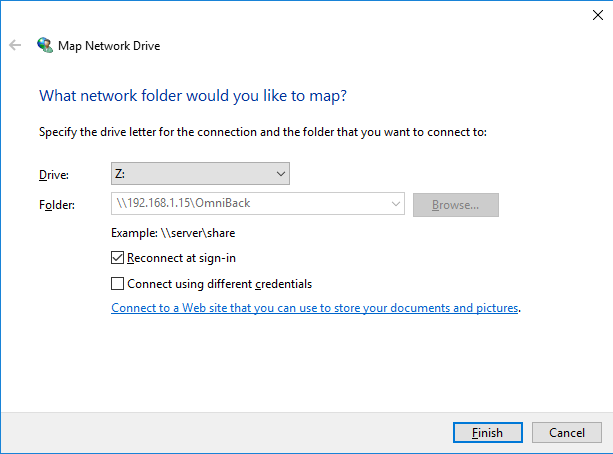
Select the drive letter you want to assign to the shared folder (Drive), and whether you want to reconnect the network drive at the next logon (Reconnect at sign-in).
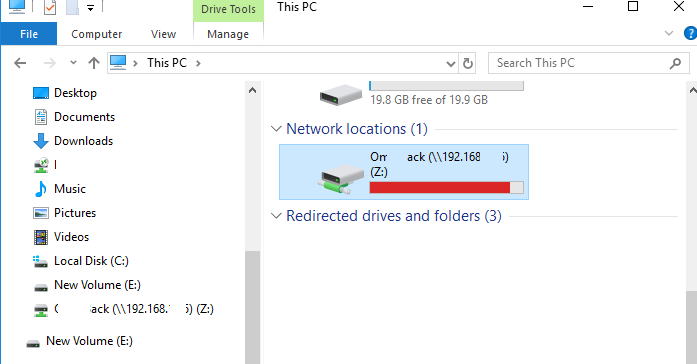
Mapped drives are displayed in File Explorer and include the drive letter and the path to the network folder in UNC format (\\servername\docs).
If you know the full UNC path to the shared folder you want to mount, you can use the net use command:
net use <drive:> <path>To mount the \\fs01\docs folder and assign it the U: drive letter, run the command:
net use U: \\fs01\docs
If you have to log in to access a shared network folder, a window will appear in which you will be asked to enter your account credentials. Or you can provide your credentials directly in the command line:
net use U: \\fs01\docs\ /user:your_user_name Your_PasswordBy default, the mapped network drive is not permanent and will disappear the next time you restart your computer. If you want this drive to be mounted automatically the next time you log on, add the option /persistent:yes
net use U: \\lon-fs01\docs\sales /persistent:yesTo disconnect a mapped drive, use the /delete parameter:
net use U: /delete![]()
Add * to remove all mapped network drives.
net use * /deleteIn order to automatically map a network drive for all the users of the computer, create a text file map_drive.bat with the following code
net use Z: /delete
net use Z: “\\fs01\docs" /user:fs01\user_name P@ssw0rdd
Copy your bat file into the C:\ProgramData\Microsoft\Windows\Start Menu\Programs\Startup directory. Your script will now run at each user’s login and will map a network drive for them.
You can use the New-SmbMapping PowerShell cmdlet to map a network drive in Windows:
New-SmbMapping -LocalPath Z -RemotePath “\\fs01\docs” -Persistent:$trueList mapped network drives in the current session:
Get-SmbMapping
sometimes you need to restart workstation service