
You can use Wireguard to connect branch office LANs with a site-to-site VPN. In this article, we will set up a site-to-site VPN using Wireguard and configure routing between networks using an rpm-based distro (RHEL/CentOS/Oracle/Rocky Linux).
Our configuration will have two hosts:
- Main Wireguard host in the central office (responder)
- Server at the remote office (initiator). The initiator may be behind a NAT and may not have a public IP address.
Let’s start by configuring a central responder server.
Install the EPEL and Elrepo repositories:
$ sudo dnf -y install epel-release elrepo-releaseCheck that the following drivers are enabled:
$ sudo lsmod | grep 8021q8021q 40960 0
garp 16384 1 8021q
mrp 20480 1 8021q
If not, you can add the driver to the Linux kernel:
$ sudo modprobe 8021qNow you can install the Wireguard package:
$ sudo dnf makecache
$ sudo dnf install -y kmod-wireguard wireguard-tools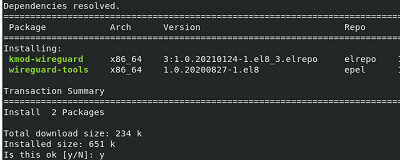
Create a key pair (private and public)
$ wg genkey | sudo tee /etc/wireguard/privatekey
$ wg pubkey | sudo tee /etc/wireguard/publickey
Create wg0 interface config file:
$ sudo touch /etc/wireguard/wg0.conf
$ sudo chmod 600 /etc/wireguard/{privatekey,wg0.conf}
Turn on routing:
$ echo "net.ipv4.ip_forward=1" | sudo tee -a /etc/sysctl.d/99-sysctl.conf
$ echo "net.ipv4.conf.all.forwarding=1" | sudo tee -a /etc/sysctl.d/99-sysctl.conf
$ echo "net.ipv6.conf.all.forwarding=1" | sudo tee -a /etc/sysctl.d/99-sysctl.conf
$ sysctl -p
Open a port in firewalld (in this example we will use port UDP/43211):
$ sudo firewall-cmd --permanent --zone=public --add-port=43211/udp
$ sudo firewall-cmd --reload
Copy the private and public key values:
$ sudo cat /etc/wireguard/privatekeyresponder-privatekey-thumb
$ sudo cat /etc/wireguard/publickeyresponder-publickey-thumb
Configure the wg0 interface:
$ sudo nano /etc/wireguard/wg0.conf[Interface]
Address = 10.1.10.1/24
# Disable overwriting the config by the client
SaveConfig = false
ListenPort = 43211
# Private Key of first Server
PrivateKey = responder-privatekey-thumb
PostUp = firewall-cmd --zone=public --add-port 43211/udp
PostUp = firewall-cmd --zone=public --add-masquerade
PostDown = firewall-cmd --zone=public --remove-port 43211/udp
PostDown = firewall-cmd --zone=public --remove-masquerade
[Peer]
# Public Key of second Server
PublicKey = initiator-publickey-thumb
AllowedIPs = 10.1.10.2/32
Start the wireguard service:
$ sudo systemctl enable --now wg-quick@wg0Check that wg0 appears in the list of interfaces and that the 43211/udp port is listening:
$ ip a
$ ss -nltup
Use the following commands to enable/disable wireguard:
$ sudo wg-quick up wg0
$ sudo wg-quick down wg0
$ sudo wg show wg0
Now install the same packages on the initiator host at the branch office. Create a key pair:
$ sudo cat /etc/wireguard/privatekeyinitiator-privatekey-thumb
$ sudo cat /etc/wireguard/publickeyinitiator-publickey-thumb
Configure wg0 interface:
$ sudo nano /etc/wireguard/wg0.conf[Interface]
Address = 10.1.10.2/32
SaveConfig = true
ListenPort = 43211
# Private Key of second Server
PrivateKey = initiator-privatekey-thumb
[Peer]
# Public Key of first Server
PublicKey = responder-publickey-thumb
AllowedIPs = 10.1.10.1/32
# public ip main server
Endpoint = xx.xx.xx.xx:43211
# If the VPN initiator is behind a NAT, add the PersistentKeepalive option
PersistentKeepalive = 25
Enable the wireguard daemon:
$ sudo systemctl enable --now wg-quick@wg0Or you can run and stop the VPN tunnel manually:
$ sudo wg-quick up wg0
$ sudo wg-quick down wg0
$ sudo wg show wg0