
When you click the Send button in Outlook, your e-mail is immediately sent to the mail server and then to the recipient. If you want to send an email automatically after a specified time, you can schedule it in Outlook to be sent at a specific time or set a delayed send.
Configuring Schedule Send in Outlook
To schedule an e-mail to be sent in the Outlook for Windows desktop app:
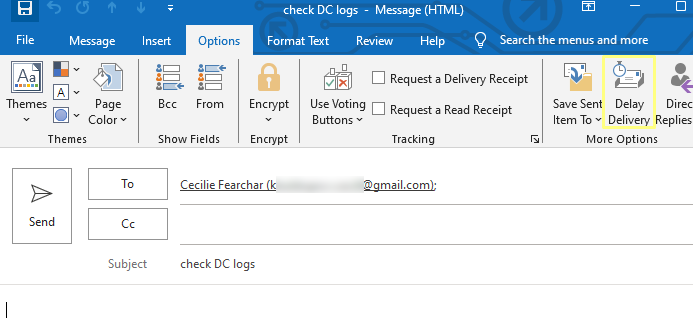
- Create a new e-mail message in Outlook, enter the recipient’s address, and fill in the subject and body.
- On the ribbon interface, go to the Options tab and click the Delay Delivery button
- Check the Do not deliver before option and specify the date and time you want to send the email.
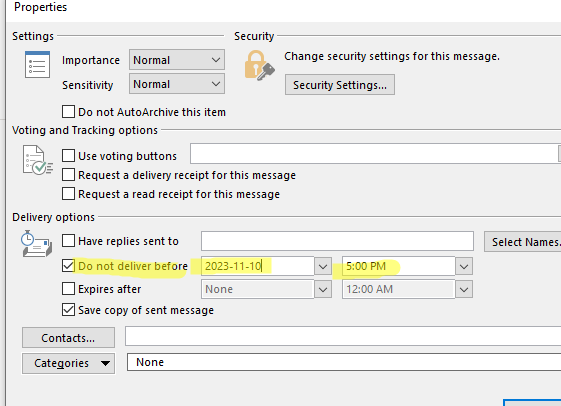
- Click the Close button. Now, send the message by clicking the Send button.
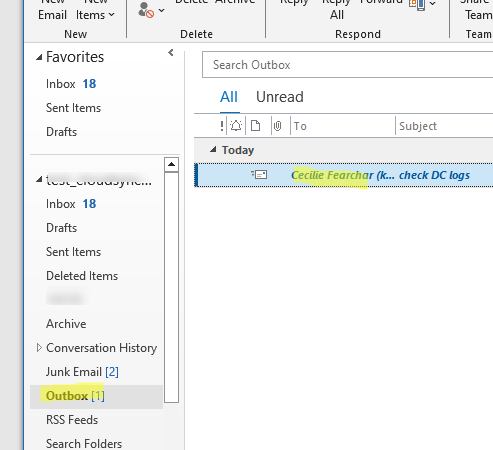
- Your e-mail message is moved to the Outbox folder and scheduled to be sent at the specified time. You can open and edit an email at any time before it is sent.
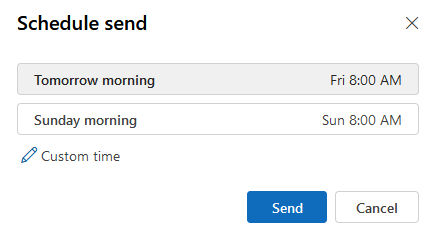
If you use a Web version of Outlook, such as OWA or Outlook on the Web, to access your Exchange mailbox, you can schedule an e-mail from the Web interface.
- Open OWA and start writing an e-mail message.
- Add recipients.
- Select Schedule send from the Send button drop-down list.
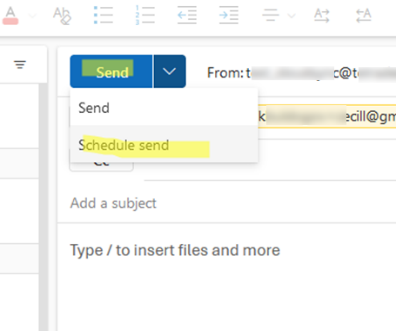
- Select the date and time you want to send the e-mail, and then click Send.
- The message will be saved in the Drafts folder and sent automatically by the mail server according to the schedule you set. In this case, it doesn’t matter if you have the OWA tab open in your browser or not.
How to Delay the Delivery of All Outgoing Emails in Outlook
You can configure Outlook to send all e-mail with a delay. This automatic delay allows you to make corrections to a scheduled e-mail message before it is delivered to the recipient.
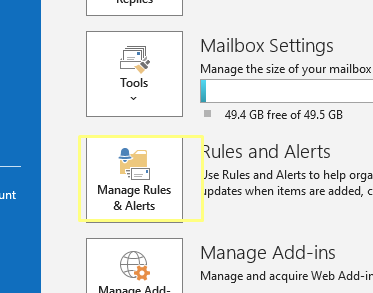
Mailbox rules can be used to configure delayed delivery for all emails in Outlook.
- Click File -> Account info -> Manage Rules & Alerts;
- Create a new mailbox rule that applies to all e-mails: New rule -> Apply rule on message I send;
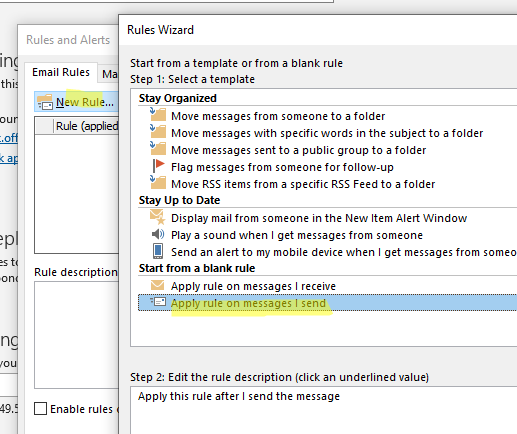
- Skip the wizard step of setting with rule conditions. A warning will appear:
This rule will be applied to every message you send. Is this correct? Click Yes;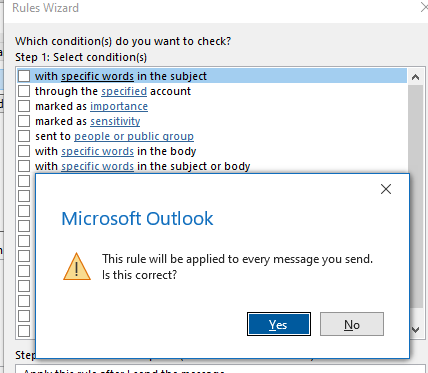
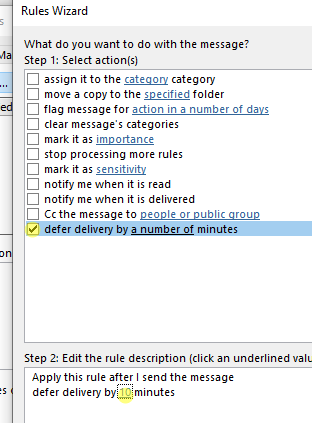
- In the “What do you want to do with the message” wizard prompt, select the “Delay delivery by a number of minutes” option. Select the amount of time you want to delay email delivery. For example, I set 10 minutes here.
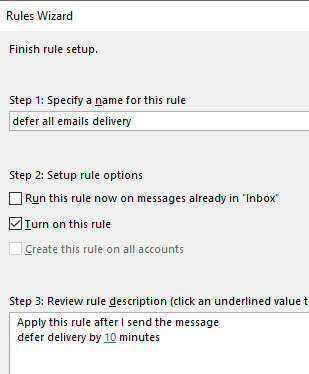
- The Outlook rule setup is complete. Specify the rule name and make sure the rule is active (the Turn on this rule option is enabled);
- Another warning will appear:
This rule will only run when you check your email in Outlook. If Outlook isn’t running, this rule won’t work for email you check online or from another device.
Now, when you click the Send button in Outlook, the email is not sent immediately but is moved to the Outbox folder. Outlook automatically sends it after the delay specified in the rule.
The scheduled send and delayed send methods only work when the Outlook client is running on the computer. You can set up a scheduled task with a PowerShell script that automatically starts the Outlook.exe process if you accidentally close it.
The following script checks whether the Outlook.exe process is running in the current user’s session and, if it is not, starts it in the background:
$СheckOutlook = ( Get-Process | ? {$_.SI -eq (Get-Process -PID $PID).SessionId}| where { $_.Name -eq "OUTLOOK" } )
if ( $СheckOutlook -eq $null ) { Start-Process outlook.exe -WindowStyle Hidden; Start-Sleep -Seconds 2 }
Save this PowerShell code in a file with a .PS1 extension. Configure this PowerShell script to run automatically every 5 minutes by using the Windows Task Scheduler.
This was a very practical guide, especially because it explains both one-time scheduling and delaying all outgoing emails with rules—something many Outlook users don’t realize is possible. I also liked the reminder that scheduled messages stay in the Outbox and still depend on Outlook being active, because that’s usually where confusion starts when an email doesn’t send on time. For anyone trying to Schedule or Delay Email Delivery in Outlook, this walkthrough makes the feature much easier to use in a real work setting, especially when you want extra time to review important messages before they go out.