
In this article, we will look at how to attach an additional hard disk to an existing Linux machine: create a partition table, format, and mount the partition with fstab. An Ubuntu virtual machine running on a VMware ESXi host is used in this example.
The first step is to add a new virtual hard disk for the VM from the vSphere Client console.
Check that the new disk drive is available in Ubuntu:
$ sudo parted -lError: /dev/sdb: unrecognised disk label
Model: VMware, VMware Virtual S (scsi)
Disk /dev/sdb: 2147MB
Partition Table: unknown
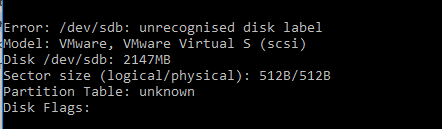
There is a new /dev/sdb disk that has no partition table.
Run the parted utility and select the new drive:
$ sudo partedselect /dev/sdb
Let’s create a GPT partition table on the hard drive:
mklabel gpt
Now we are going to create a new partition that will take up all the available disk space (100%):
mkpart primary 0% 100%
Leave the parted session:
exit
Check the file system of the new partition:
$ sudo lsblk –fs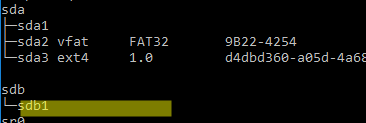
There is no file system on /dev/sdb1.
Format the partition using the ext4 filesystem:
$ sudo mkfs.ext4 /dev/sdb1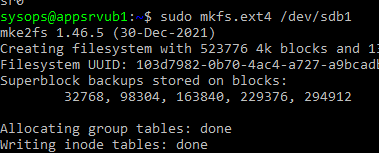
View the information about the new partition:
$ sudo parted /dev/sdb1 printNow let’s enable the automatic mounting of the new partition.
First, manually mount the partition to the directory:
$ sudo mkdir /mnt/backup
$ sudo mount /dev/sdb1 /mnt/backup
You need to know the UUID of a partition to automatically mount it using fstab:
$ sudo blkid /dev/sdb1Copy the UUID.

Now you need to edit the fstab configuration file:
$ sudo mcedit /etc/fstabAdd a mount line at the end:
UUID=103d7982-0b70-4ac4-a727-a9bcadbc465e /mnt/backup ext4 defaults 0 2
Unmount the partition:
$ sudo umount -l /dev/sda1Check if the fstab configuration is correct:
$ sudo mount –aNow the new partition will be automatically mounted when Linux boots.
I am sure this post has touched all the internet people, its really nice post on building up new webpage.